Materials
- Fleece (width of the fabric is 160cm) :
- 4m of black (depends on the pattern, for very baggy kigus you might be better off with a bit more to be comfortable)
- 0.5m of red (fins and inner lining of the hood)
- 2 zippers
- one for the body : measure out from your neck to the bottom of stomach
- one to hold the tail to the body, must be detachable : measure out on your patterns
- Elastic bands for the wrists and ankles, measure out to fit snugly and add 2cm
- Stuffing for tail, ears, tufts and spikes
- Thread : black and red
- Needles, seam ripper and other common sewing supplies
This tutorial roughly follows the DIY Onesie! (Kigurumi Rilakkuma style) by withwendy. I will only cover the parts which I adapted.
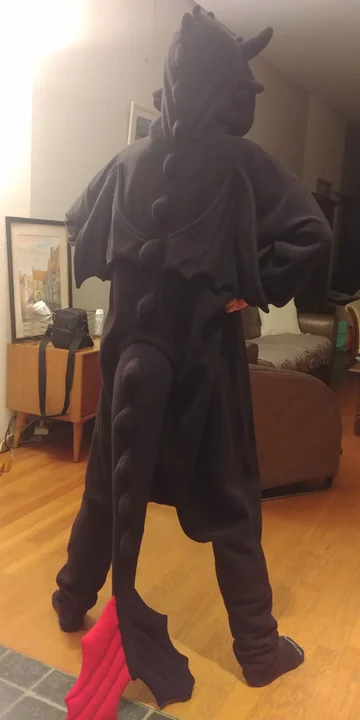
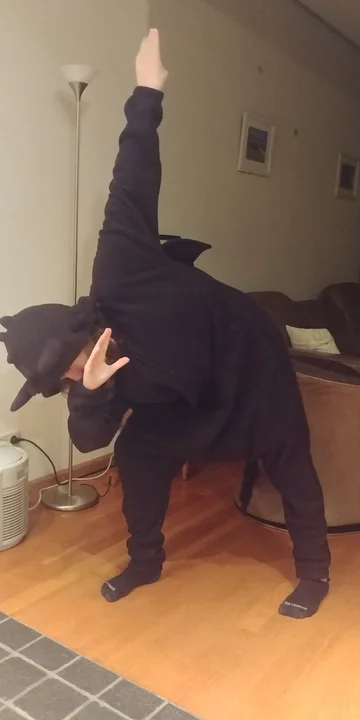
Some pics of my sister wearing the finished kigu !
Patterns
Kigu body
The base of the kigu is very simple. I already had an old store-bought pattern, which I adapted to make the arms and legs longer, crotch higher, and a bit less baggy. If you already own a onesie, you can trace it out to make the pattern, or just draw it from scratch.
The patterns are traced out with chalk, which makes cutting out much easier.
Unlike in the video, I don’t have separate feet or tummy pieces.

The body pieces front (above) and back (below), with the two sleeve pieces.
Not shown on this picture are the hood parts, which were cut out after I had already sewn the body piece. This is in order to measure out the neck circumference (subject to change because of seam allowance) and adapt the hood pattern as needed.
Decorations
These patterns are hand-traced from paper sheets. If you don’t have a big paper sheet, you can tape smaller ones together.
Tips for making your own patterns :
- Leave some space for seam allowance, which adds 1 to 2 cm to your patterns !
- Mind the good/bad side of the fleece, as well as (in some cases) direction of pill (orientation) !
Spikes
Spikes come in different sizes and shapes (to keep the kigu interesting), meaning you’ll have to create a few patterns : I had patterns for XL, L, M and S spikes. The final kigu counted about 15 spikes, running down the hood, onto the spine and down the tail. I also exaggerated the spikes on the head and tail.
Wings and fins
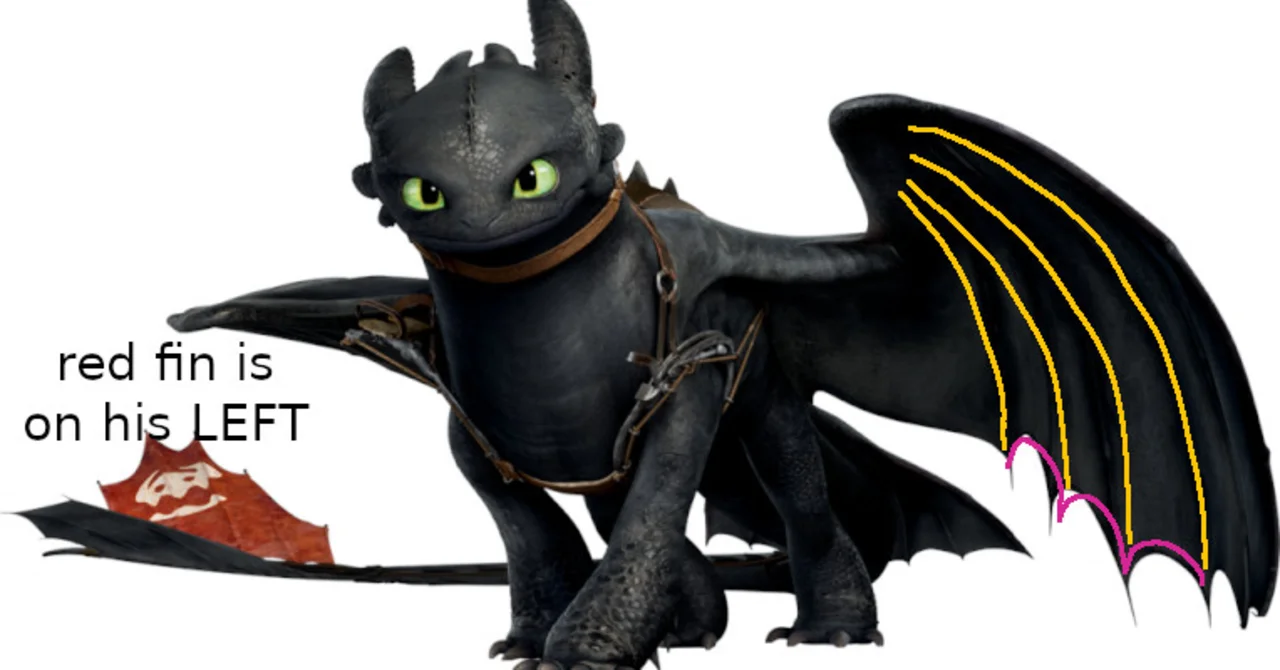
I simplified the wings to leave the “fingers” (in yellow) and the “indents” (in purple). On the kigu, they are fixed near the spine, and the top to the shoulder (see pictures).
The fins are simplified as well.
Tail
For the tail length, measure out from the bottom of your spine to the floor, and add a few more centimeters (but of course, you can make it as long as you like !). The curvature is there to help it to curl upwards instead of dropping down when attached. Be careful to leave the opening diameter (diameter=circumference/π) large enough !
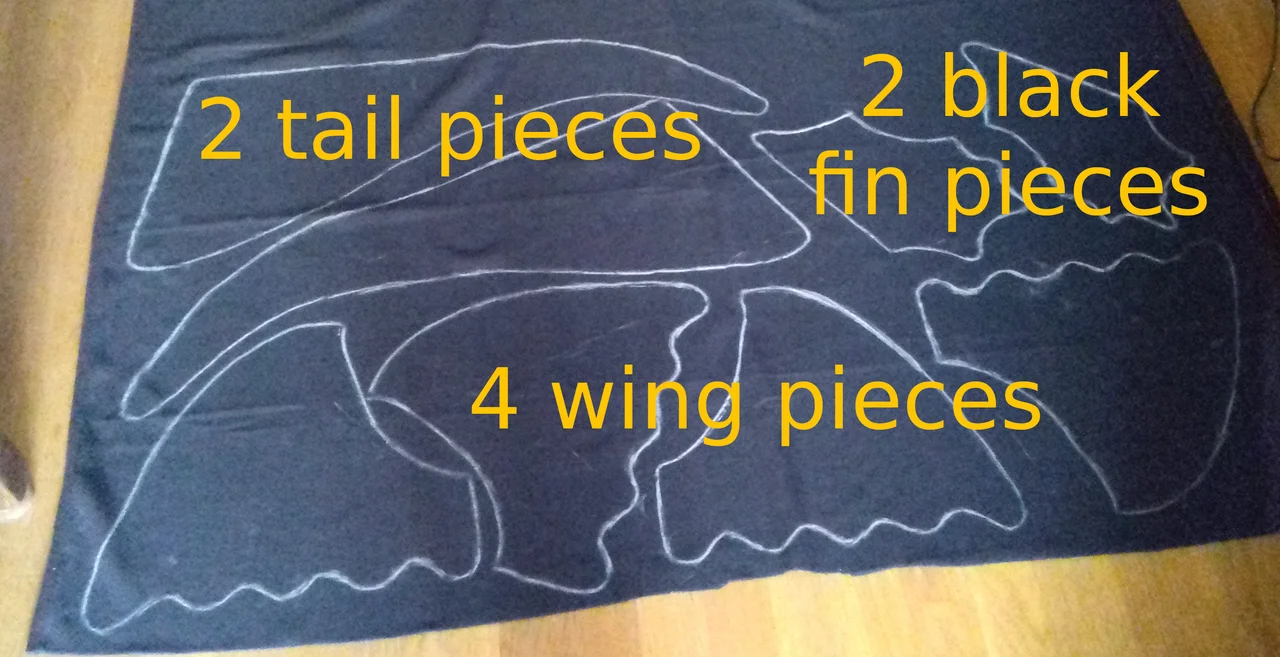
Not shown on the picture are the two red fin pieces.
Head
Lots of tiny details will be sewn to the hood. The patterns and sewing are mostly trial and error until you get a part that “looks right”. Luckily these are small parts, so you can try cutting them out of leftover fleece from larger parts.

I’m no expert in dragon anatomy, these are the names I came up with !
Sewing it together !
Tips for sewing with fleece :
- Use a jersey ball point needle
- Test out your tension settings and stitch length on scrap fleece
- Stress test your seams on scrap fleece, and adjust settings as needed
Front body piece
Sew the front body piece with the zipper @2’28".
Back body piece
Spikes
- Lay one back piece on your back, and mark/pin where you can the center of the tail to go.
- Mark with regular spacings where you want the spikes to go, keeping in mind their size and the tail.
- Cut out and sew spikes as needed. Be careful to leave the opening !
- Pin together the back piece and one side of each spike.
- Add stuffing. Push everything to the bottom to keep the seams clean and make the next steps simpler. You can reposition the stuffing afterwards from the outside.
- Overlay the second half of the back piece.
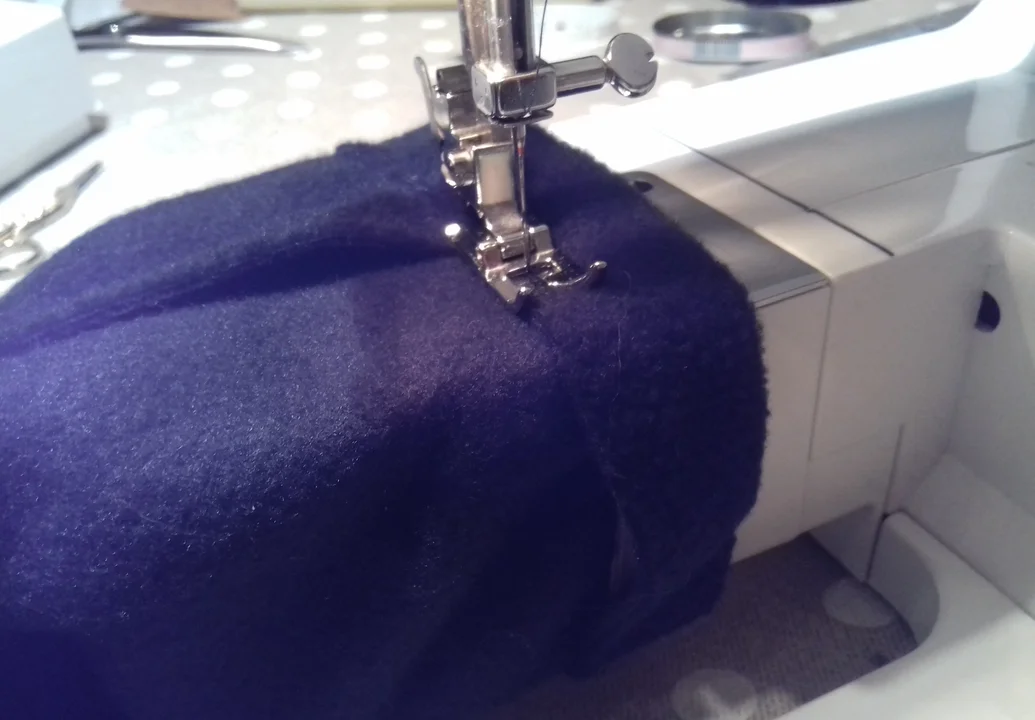
- Remove the bottom pin, and abundantly pin all 4 layers together.
- Carefully sew the two backpieces together. I used a zipper foot to alleviate stress. Go slowly, and use the manual knob if needed. You will need to help pull/push the fabric along with the machine.
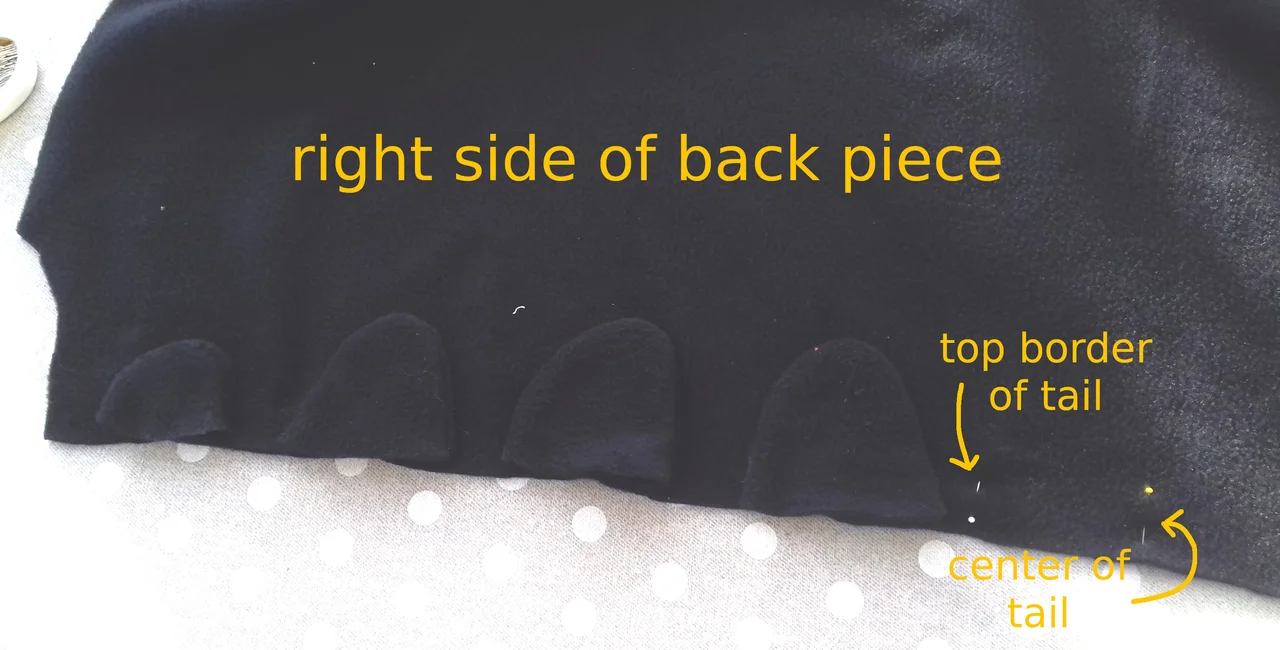
Layout of the spikes before pinning them in place.
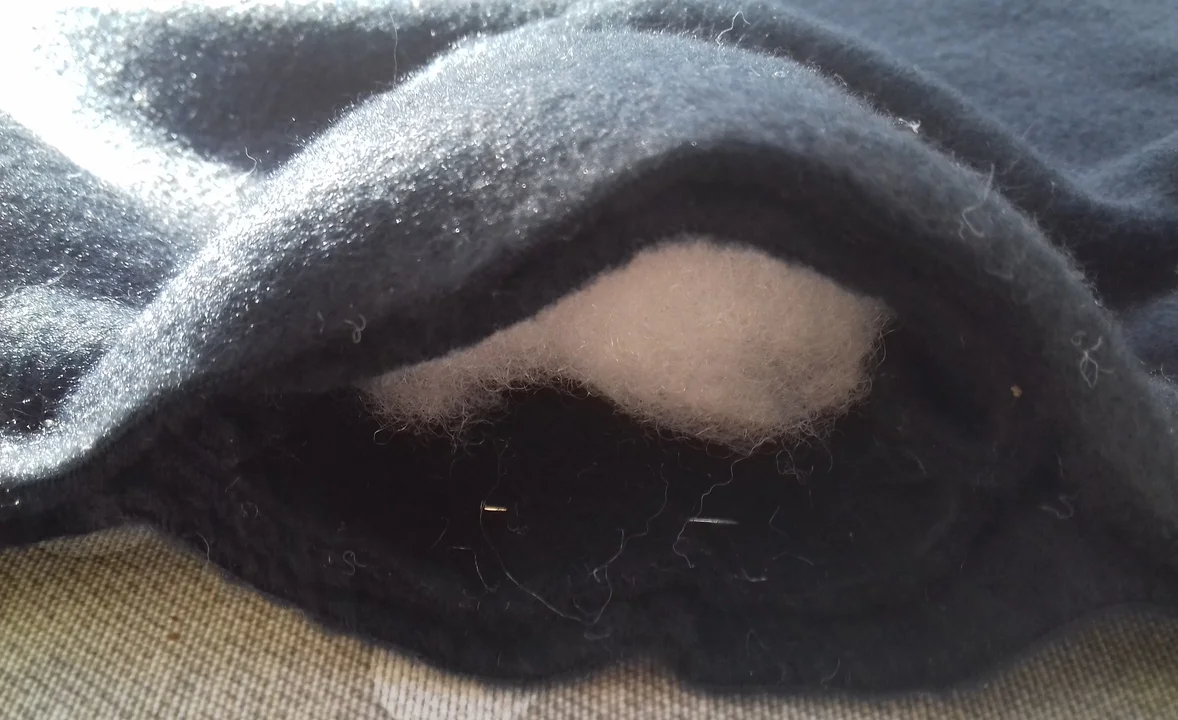
Stuffing the spikes.

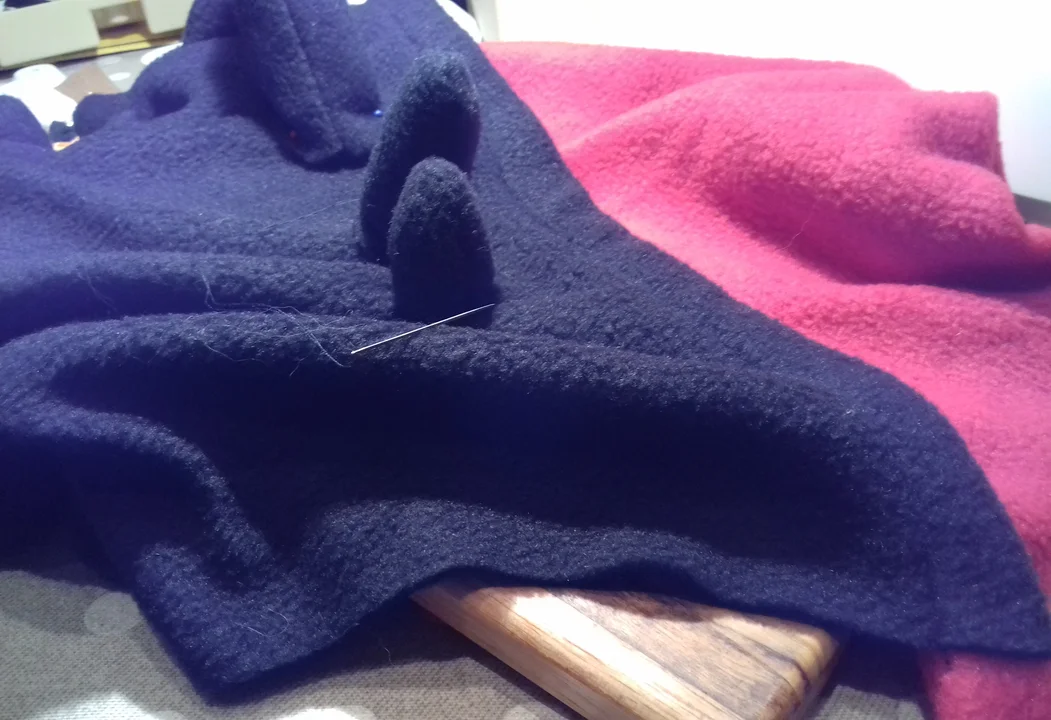
Pinning the 4 layers together, ready to be sewn.

The two back pieces sewn together, with spikes sandwiched in.
Removable tail
- Cut a circular hole of diameter ~2cm smaller than the diameter of the tail.
- Separate the left and right parts of the zipper. Pin down the part without the foot. Keep the end parts pointing down, so that when attached, the tail will fall onto the zipper foot and hide it.
- Sew down the pinned zipper part.
- Cut out a large circular patch to cover the hole and zipper, and sew it on the inside over the hole and zipper.

Zipper part without foot sewn into place.

Patch sewn into place. It’s not the prettiest solution, but it works. If you have a suggestion to make this better, I’d be glad to hear it !
Putting the body together
Now continue on assembling the kigu together, sewing along the shoulders, then the arm pieces, then the outer and inner sides.
I used a different technique (which I find easier) for the waistbands. Form a loop with the elastic strap using a zigzag stitch going back and forth. Then place the loop over the wrong side of the sleeve, fold the fleece over the elastic and sew.
Sewing the wrist and ankle openings.
One wrist opening complete.
Hood
- Cut out the hood pieces to appropriate size, having measured around the neck opening of the main body piece. Unlike the video, I don’t have a face and can simplify the hood to 4 pieces that each roughly look like a quarter disk : 2 pieces for the outside (black), and 2 pieces for the inner lining (red). Cut the black hood pieces ~2cm larger than measured.
- Sew the left and right sides of the inner lining together. Lay open the seams and sew them down, preventing the fabric from bunching up inside.
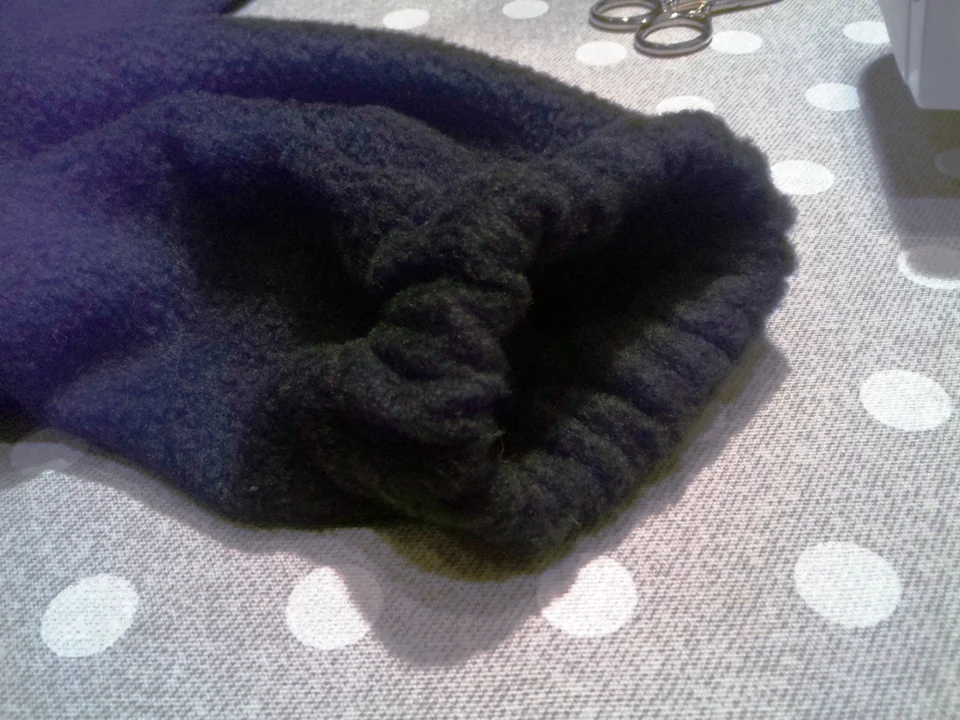
- Similarly as for the backpiece spikes, sew the left and right sides of outside together with the spikes.
- Put the inner lining in the hood, fold the excess black fleece over the inner red lining and sew a straight line.
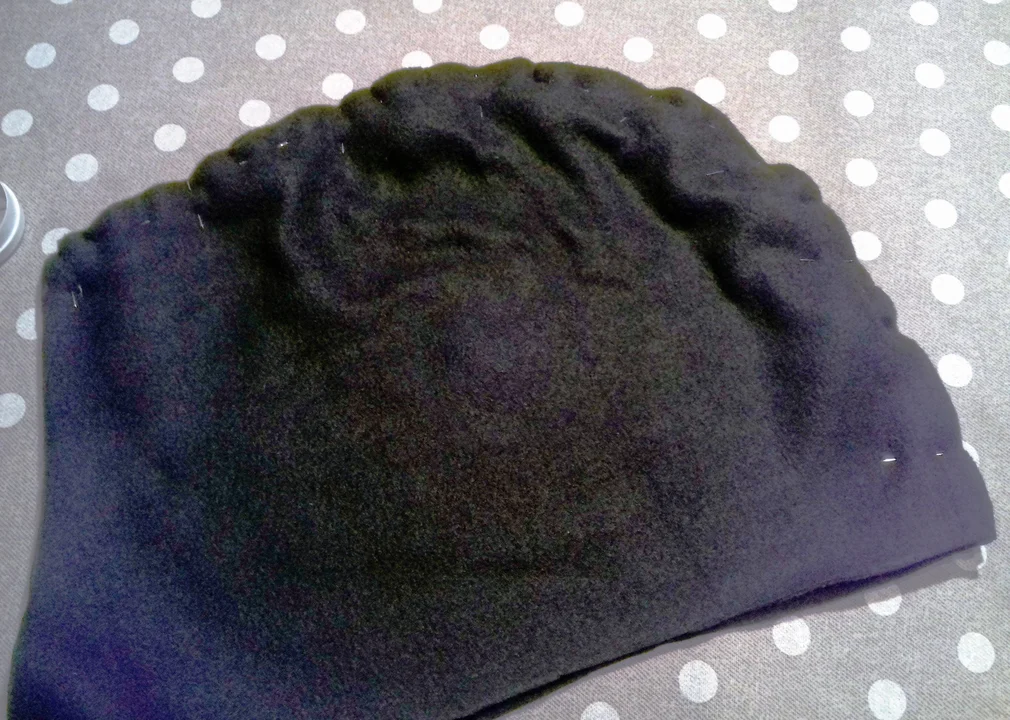
- Stuff and pin the head decorations on the outside layer of the hood. Try on the hood and reposition as needed. Manually sew in place using an invisible stitch (also called ladder stitch).
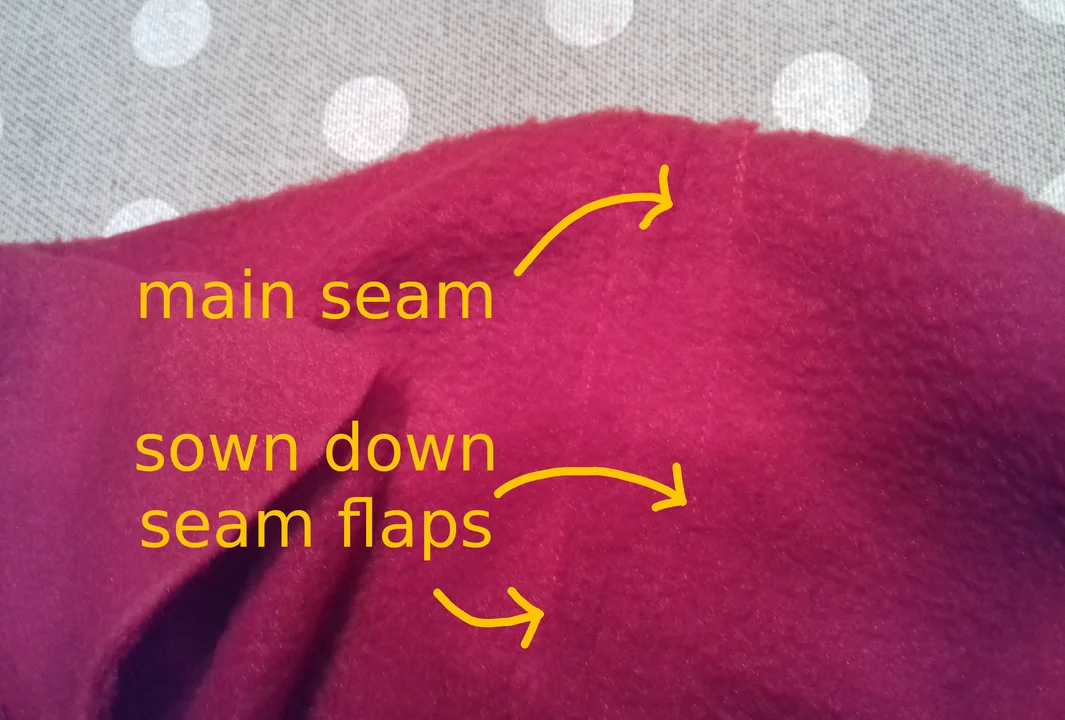
- Sew the hood to the main body piece. Optional : sew down the excess flaps in the inside.
Inner lining left and right pieces sewn together.
Outside part with spikes sandwiched and pinned between the layers, ready to be sewn.
Sewing down the head decorations.

Hood sewn to the main body piece. The seam has not been sewn down yet.

Completed hood and body piece !
Tail
- Similarly to the back piece with spikes, sew the right sides of the tail together, with the stuffed spikes sandwiched between.
- Sew the zipper in place on the inner part of the opening.
- Add lots of stuffing. You might need some kind of rod to push the stuffing into the tip of the tail.
- Measure and cut a disk to cover over the opening of the tail. Stitch in place (you might need to do this step manually).
- Sew the red and black tail fins :
- Sew along the outside, right sides together
- Using scissors, cut the excess fabric near the stitch. Be careful not to cut the stitch itself !
- Flip inside out, and use a stick to help form the angles
- With chalk, trace the “fingers”. By using chalk, you can try out multiple times before settling for a good shape.
- Sew along the traced chalk.
- Stuff lightly, again using a stick to push in the stuffing
- Stitch the tail fins to the end of the tail using an invisible stitch. Be careful with the left/right position of the red and black fins !
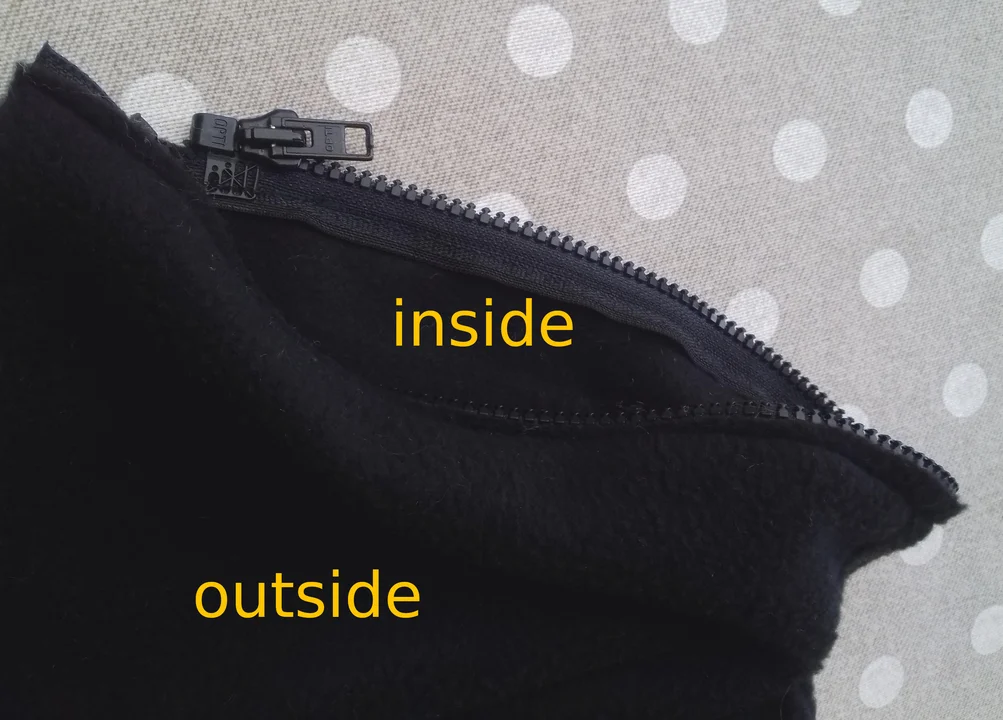
The zipper sewn inside of the tail opening.
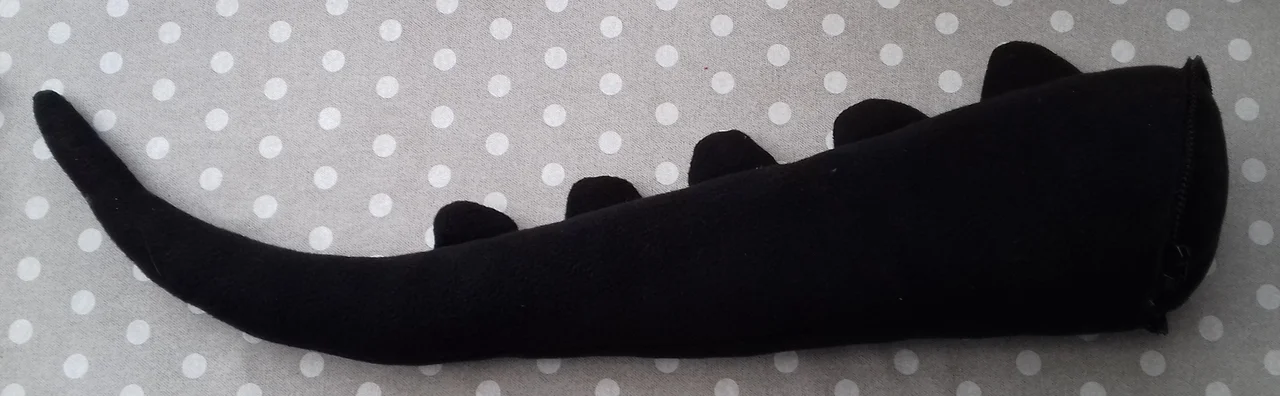
The tail, stuffed and with opening stitched shut ! At the time of making this, I didn’t think of sandwiching the spikes while sewing the tail together, and ended up stitching them manually.
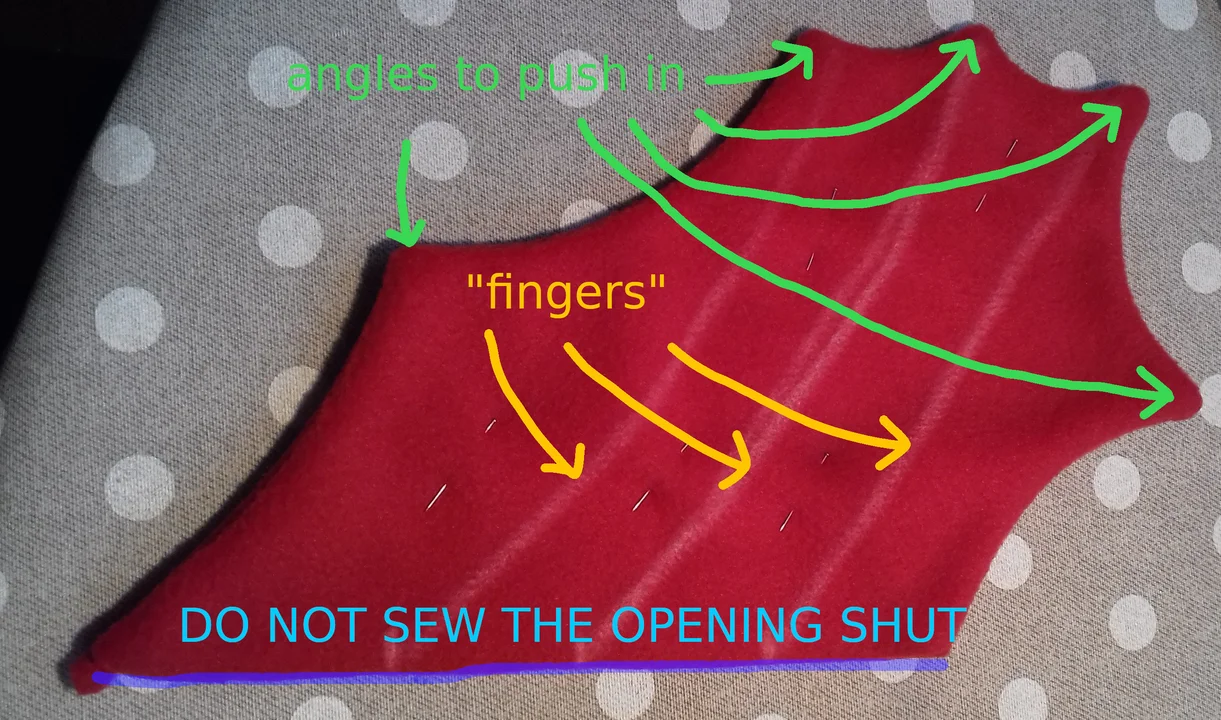
Close-up picture of the red tail fin, before sewing the “fingers” and stuffing.
Wings
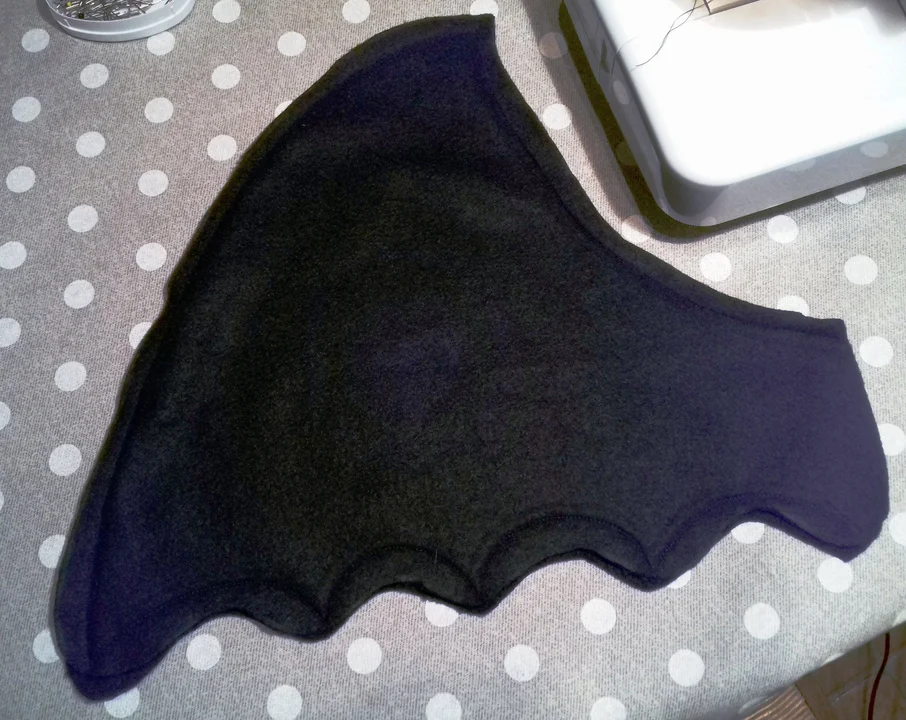
- Sew the wings following the same steps as the tail fins, but without stuffing. I also sewed a line along the outside of the wing for structure.
- Pin the wings onto the body to find the ideal location for them.
- Stitch the opening close to the spine to the body using an invisible stitch. Be careful not to stitch the front body piece with it !
- Stitch the extremity of the wing close to the shoulders by poking through the back body piece, in and out multiple times around the same spot.
One wing inside out. Here parts of the excess fabric have been cut out to help with the angles while turning inside out.
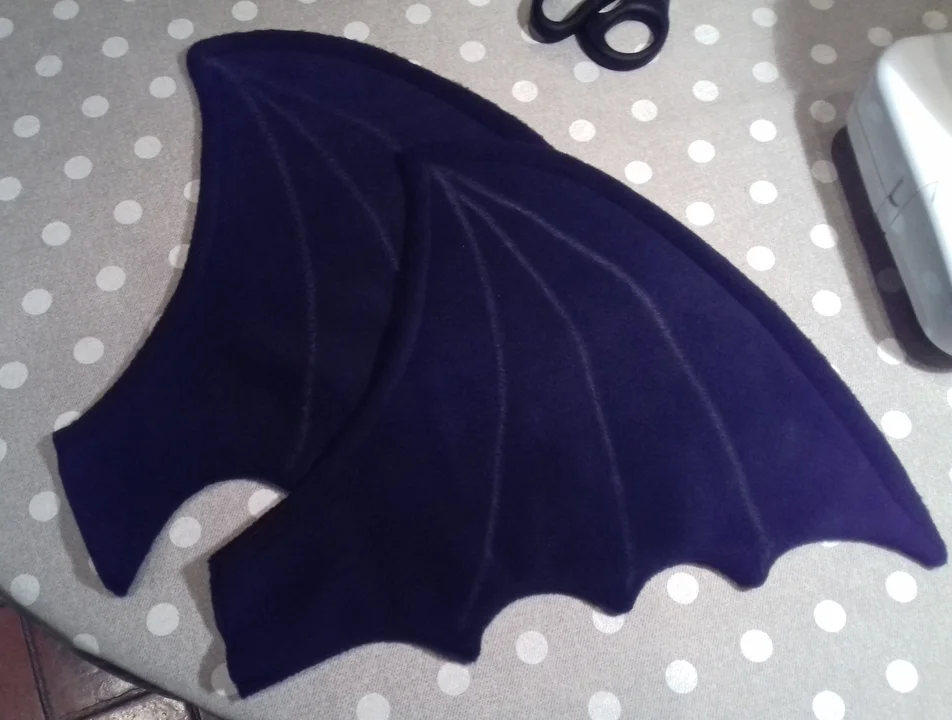
Two nearly finished wings. The structural stitch along the top has already been sewn.
Finishing up
All that remains is to zip on the tail and put it on !
Since the kigu is a bit bland with one uniform colour, an idea would be to glue faux tiny semicircular black leather patches to mimic the scales. But testing out on scrap fabric, I had trouble getting my samples to stick correctly so I didn’t want to risk it.